
Applying foundations and powders with a dash of lip color may be enough to step out the door. But when glamorous makeup is in view, we go further to talk about contouring and highlighting.
Makeup contouring is a technique used to sculpt the face, and it is also a great way to gently correct any features or remote areas of the face. Contouring can also enhance any feature to make them appear larger.
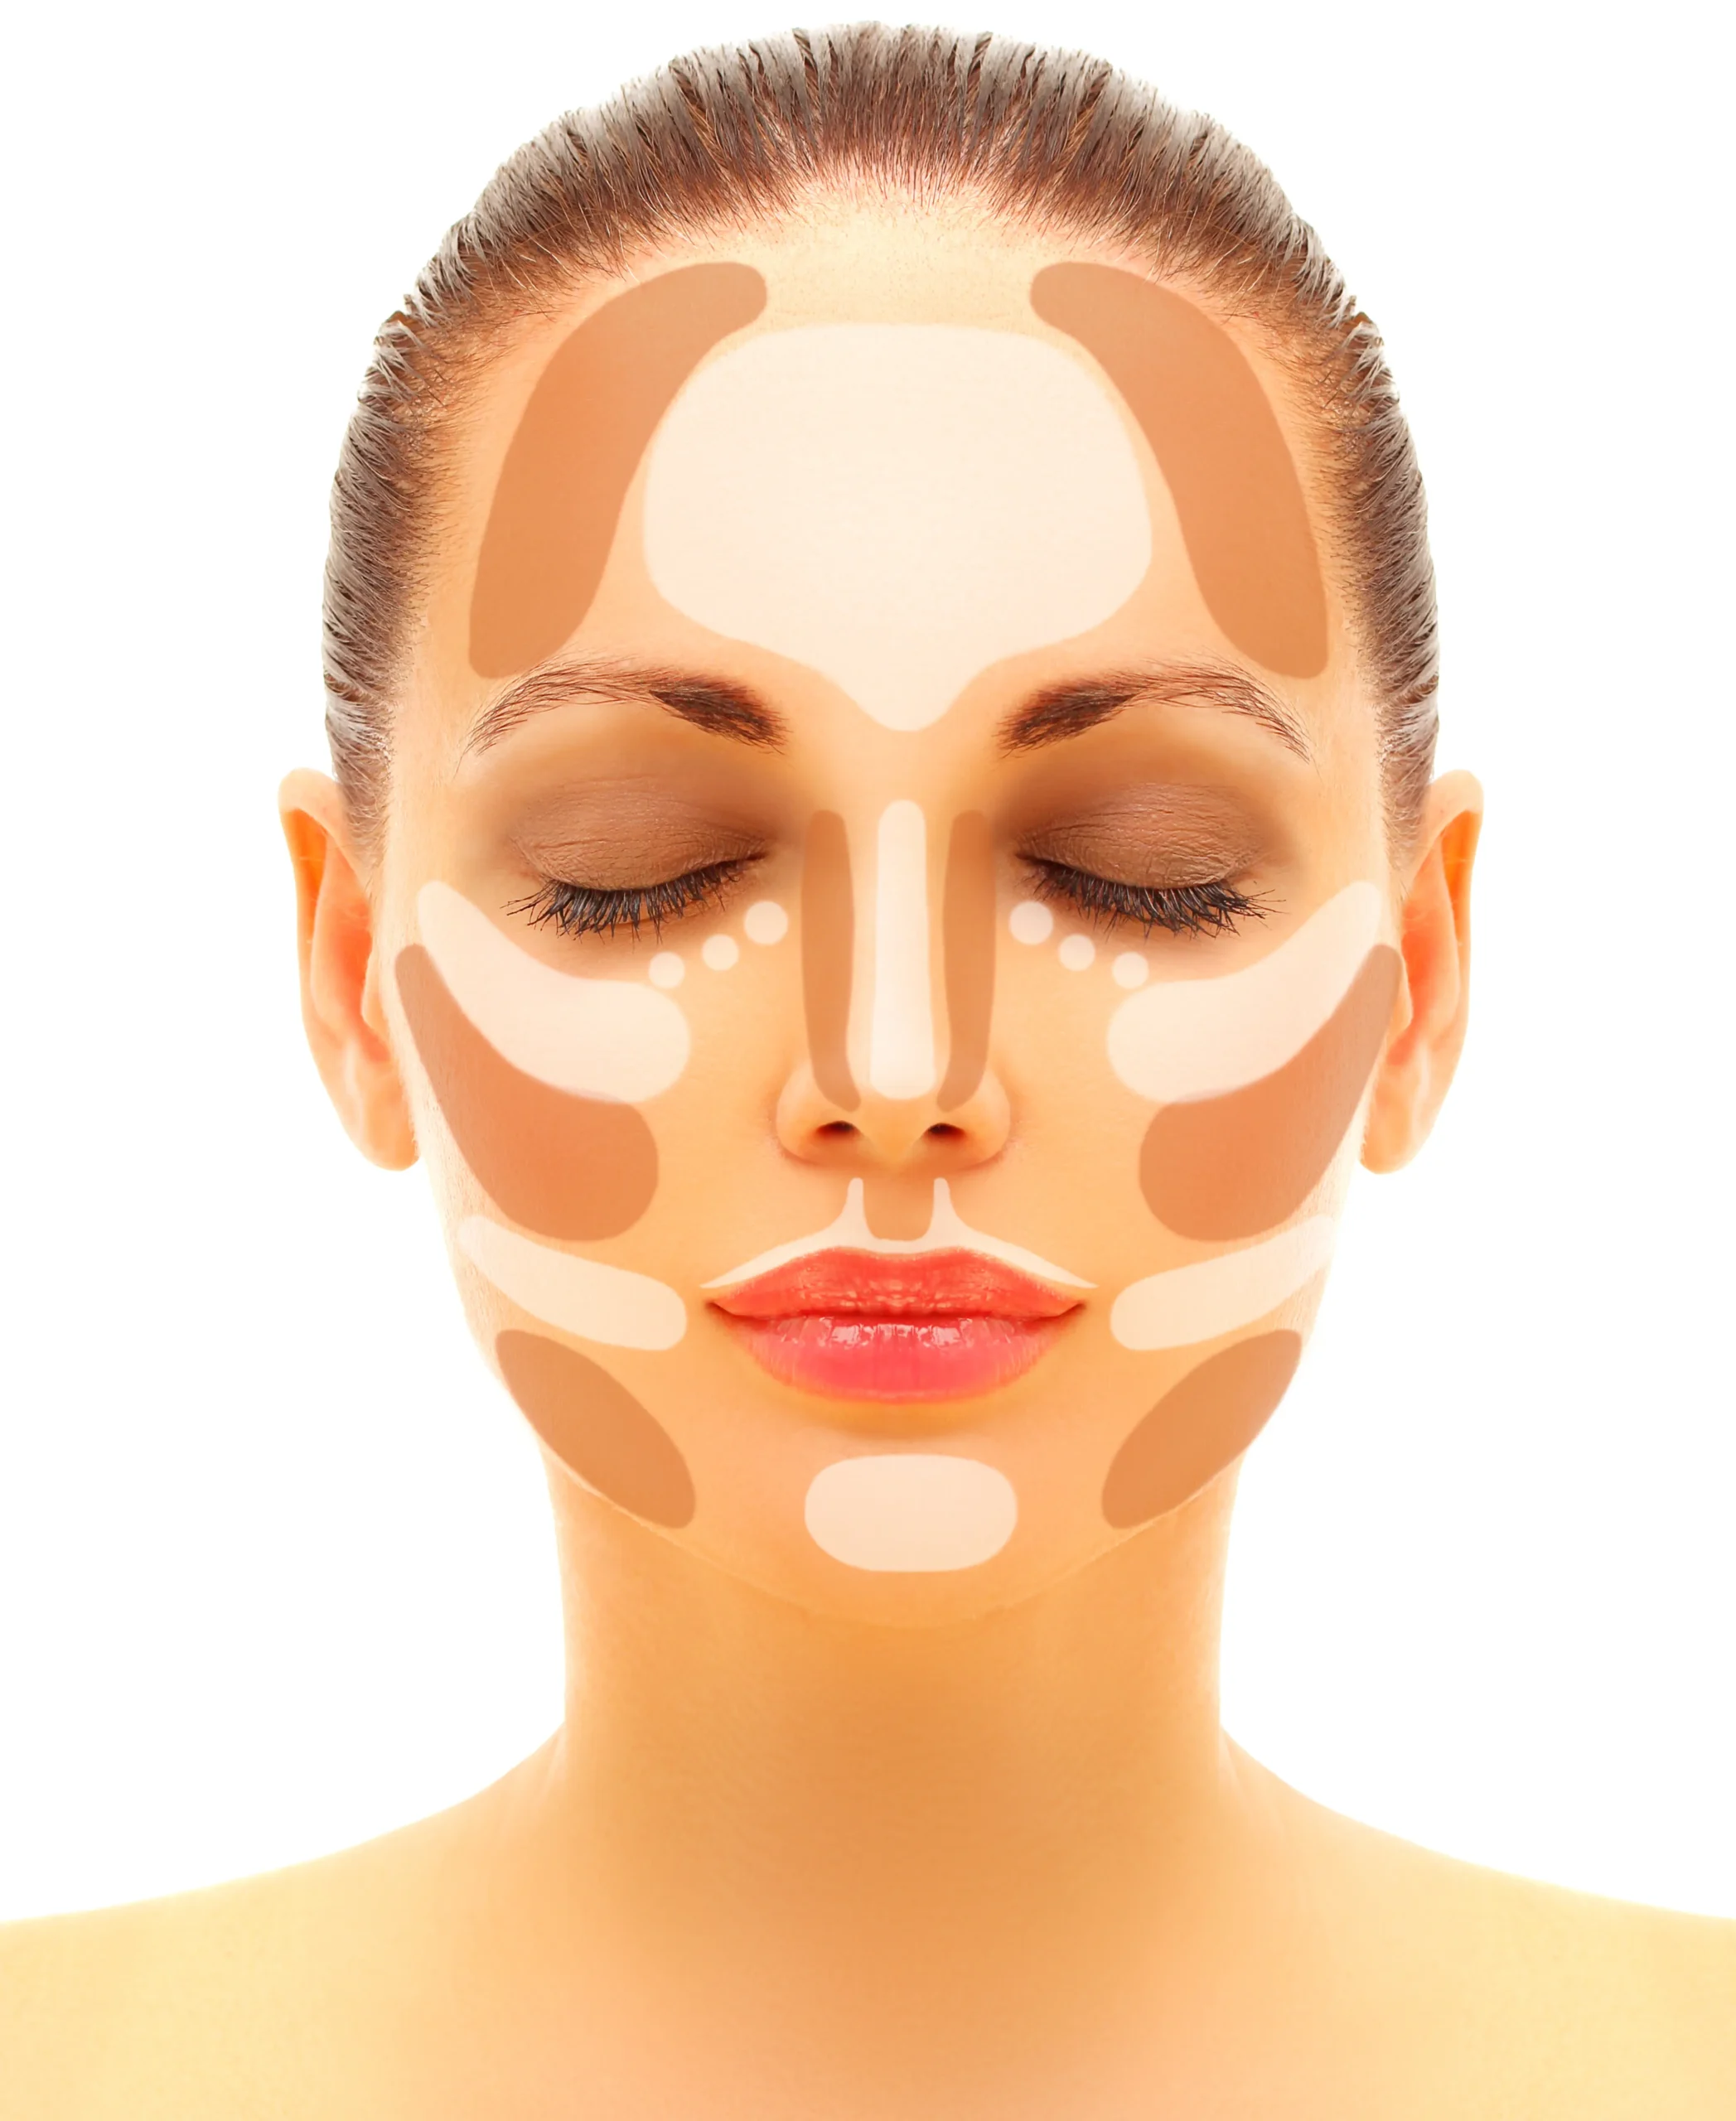
Contouring involves using light and dark foundation shades to highlight, slim down, or deepen certain features of your face that otherwise won’t pop on their own.
Types of Contouring Techniques
About nine different types of contouring techniques exist, as beauty enthusiasts have, over time, come up with creative ways to achieve contouring.
Some of these techniques involve contouring for other body parts apart from the face. We will, however, stick to the methods that have to do with the face alone.
1) Classic Contouring: this is the most commonly used contouring technique. It involves a mix of dark and light shades of makeup to make your features, such as your nose, jawline, and cheekbones, pop out.
2) Lip Contouring: involves using lighter shades of lip color in the middle of your lips and darker ones on the outer corner to make your lips look more pouty and voluminous.
3) Henna Contouring: as the name implies, involves using a dark and a light shade of makeup to draw Henna lines and eventually blend.
4) Clown Contouring: this makes you look like a clown during the process, as your face is mapped out in several shades to achieve a perfect look.
5) Hair Contouring: this is an easy contouring technique. In this technique, a professional applies dark and light highlights on the hair, mainly around the face area, to accentuate your facial features and help you fake the perfect bone structure.
What Are The Benefits Of Contouring?
• Contouring adds more depth to your eyes
• Contouring makes your face look oval-shaped
• Contouring creates the appearance of a fuller look
• Contouring makes your nose appear naturally slimmer and more defined
• Contouring hides a double chin and adds definition and shape to your face.
How To Apply Contour Makeup
The first step to contouring your face is creating a makeup base with primer and a dealer.
- Pick out your brushes and contour product. You need small, fluffy brushes for precision and contouring and one for highlighting.
- Identify features you desire to conceal. Vital areas to darken or this on tour include along the hairline and jawline, under r the cheekbones, and alone,g each side of the nose.
- Use a damp makeup sponge or contouring brush,h to blend the liquid-based steam, liquid, or powder on the skin.
Highlight
Apply a highlighter that is lighter than your natural skin tone to areas like yours;
- Chin
- The bridge of your nose
- The center of your forehead
- Under your eyes
Use a damp beauty sponge or face brush to blend cream or liquid formula into the skin. If you use a powder, gently sweep the product over the skin and dust the excesses away with a fluffy makeup brush.
Finally, set it with a translucent powder.
How To Apply And Blend Contour According To Face Shapes
Contouring techniques put into consideration the shape of the face. Whether you want to go into makeup artistry or up your makeup game, contouring according to your face is the surest way to glamorous makeup.
Below are five primary face shapes and how to contour and blend each.
1) Round Faces

Round face shapes have an almost similar length and width and are, most likely, symmetrical.
To Contour:
Apply contour product along the sides of the forehead and temples, down to the hollows of the cheeks, dragging it down to the jawline.
Also, lightly sweep the contour to the lower chin.
To Highlight:
Create an inverted triangle shape under the eyes.
2) Heart-Shaped Faces

Heart-shaped faces have a wider forehead which narrows to a pointed chin. This face shape also has a jawline that is more angular and pointed.
To Contour:
Apply contour product along the hairline down to the sides of the forehead and temples.
Sweep a light amount into the hollows of the cheeks down to the apples below the chin.
To Highlight:
Create an inverted triangle shape under the eyes and in the middle of your forehead and chin.
3) Oval Faces

Like round faces, an oblong or oval face shape is symmetrical and has a rounder perimeter but is more elongated. It is also the most straightforward face shape to contour.
To contour:
Apply contour on the hollows of the cheeks and the sides of the forehead.
To Highlight:
Create an inverted triangle shape under the eyes
In the middle of your chin.
4) Diamond-Shaped Faces
Diamond face shapes have the cheeks as the most prominent area, narrowing width towards the hairline and chin.
To Contour:
- Apply contour to only the side of the face. The upper and lower areas of the face are almost the same width; start contouring from the temples to the hollows of the cheeks.
To Highlight:
- Create an inverted triangle shape under the eyes, chin, and middle of your forehead.
5) Square/Rectangle Faces
Square face shapes have a wider hairline and an angular jawline, and a square face has the same width for features such as the forehead, cheekbones, and jawline.
To Contour
- Apply it around the temples and sides of your forehead to slim down the upper portion of the face.
- Apply below the cheekbones. Make it closer to the angles of your face and quite far into the center.
- Sweep the contour along the jawline until halfway to the chin to slim down the jaw.
To Highlight:
- Create an inverted triangle shape under the eyes.
- Also, in the middle, it’s your forehead and chin. Apply a lighter shade concealer and blend.
Types of Contour Products
Powder Contour
Popular in most contour kits, and it’s excellent for beginners as it is the easiest to blend. Matte finishes are most straightforward for most powder-based contours and suitable for oily skin, and this contour type is best applied using a contour brush.
Liquid/Cream Contour
This comes in stick form and isn’t easy to blend as a powder-based contour because it is thicker. It is better suited to those with dry skin, wrinkles, or fine lines. Liquid-based contour is best blended using a beauty sponge.
In conclusion, makeup contouring defines your face, and many other benefits are stated above. It, however, takes time to learn how to contour perfectly. So, it’s essential to be patient with yourself while trying to get the hang of contouring. In the meantime, get professional help, or keep practicing.
You might also be interested in: